Widgets are an easy way to alter your website and can link to other places where you might be posting your content, like Facebook or Twitter. Most of the time, there are a few steps involved in using widgets, but it’s generally not that difficult to add them to your page. In many cases, social networks like Tumblr and Pinterest will provide instructions and code for using their widgets (which might also be called “buttons” or “portlets” or “badges”). Let’s look at Tumblr as an example—it’s one of the easiest to use.
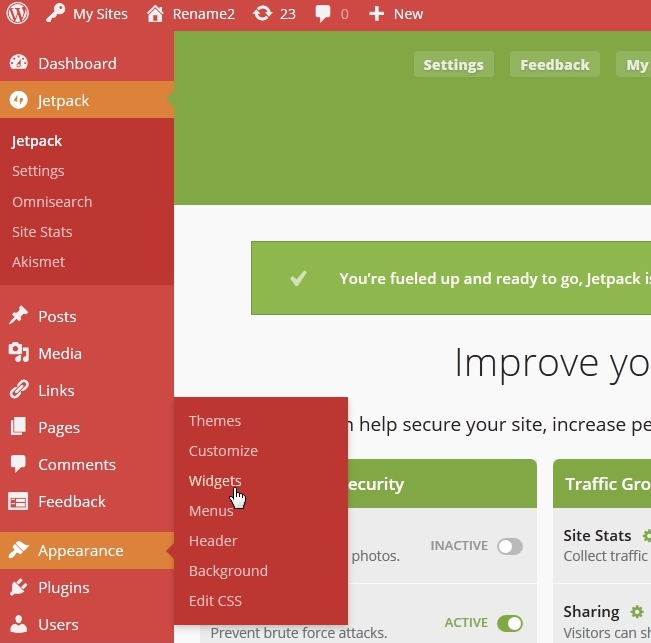
This is Tumblr’s “Buttons” page. To generate your button, you simply pick what you want your button to do, then choose your placement and color. A string of code is generated, which you’ll need to highlight and copy. Now go back to your website’s Dashboard and click on Appearance —> Widgets.
You’ll see a long list of options in alphabetical order, but for this widget, you’ll want to scroll down to Text.
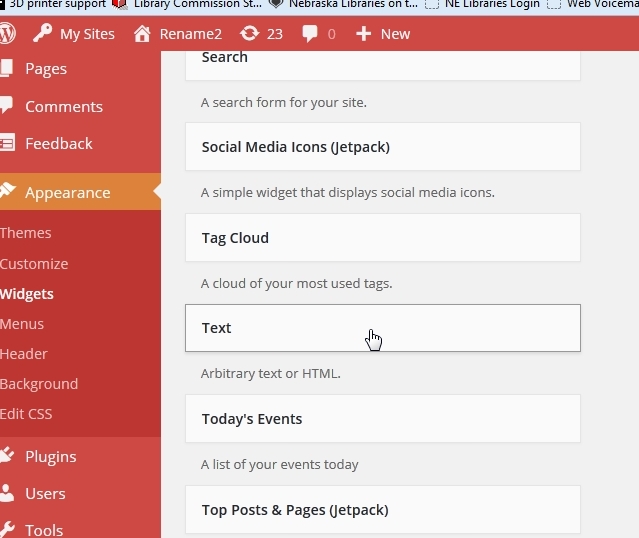
Click on Text and you’ll see a list of areas where you can place your widget. Mostly, you’ll want to keep it in the Primary Widget Area. When you click on that, a new Text Widget area will open up on your right side. It looks like this:
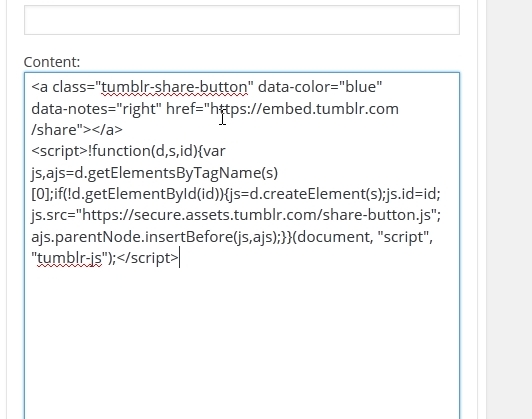
I paste the code that I copied earlier into the Content Box, then click Save at the bottom. The end result on my website looks like this:
 I now have a Tumblr button on my site and my readers can share my page directly to their Tumblr sites. It’s not a one-step process, but it gets easier with some practice. Prior posts on this blog outline how to create widgets for Overdrive and Overdrive Kids. I’ll cover Facebook, Twitter, & Pinterest, which act a bit differently, in the next post. Thanks for reading!