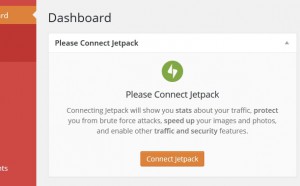
In the last post, I talked about using text widgets to add links to services like Tumblr & Overdrive to your website. This time, we’ll see how to use some of the widgets built into Jetpack to add Facebook, Twitter, and other social networks to your site. First, you need to make sure that your Jetpack plugin is connected. If you log onto your Dashboard and see this—
—it is not connected. But it’s easy to fix. Just click the Connect Jetpack button. You’ll then go to a screen that allows you to enter your WordPress username and password. This is not the same username and password that you use to access your site. If you don’t already have a WordPress username, you should click Need an Account? and create one. After all that’s done, enter your credentials to connect Jetpack. Once you do, you can go to Appearance—>Widgets and see a much longer list of options.
Facebook, Twitter, Pinterest, weather widgets, and more are all right here. All that you need to do is hover over the widget you want, click on your mouse, and drag the widget over to the right while keeping your mouse button pressed down. If you’ve played Solitaire on a computer, it’s pretty much the same motion you use to move cards around. The animated image below shows you how to move the Facebook widget over. We scroll down to Facebook, click it, drag it, and put it where it needs to go. I chose to put this widget at the top of the list. Once it’s there, a new box opens up that allows me to enter the URL of the Facebook page to which I want to connect.
As always, if something is giving you problems or you can’t find the right widget for what you want to do, please give me a call or send me an email! Thanks for reading!

